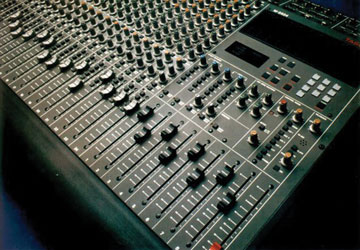
Tips to Make Your Band Sound Great Live
This article will focus on the benefits of using a vocal monitor and best practices when you are running your own sound.
LOM Drew St. John Reports

The most common PA mistake is to neglect the use of a vocal monitor when running your own sound system. Proper vocal monitoring is elemental if you want to have a great performance.
Vocal monitoring can come from a standalone solution or by simply changing the signal routing in your current rig. A monitor differs from a main speaker in the fact that it must provide audio to a musician that is in close proximity and who may be holding an instrument that could introduce feedback into the system such as an acoustic guitar plugged into the mixer. For this reason, a monitor may need different placement, mixing, EQ and volume than its main speaker counterpart.
Placement
Keep your monitor on the floor in front of the microphone you are monitoring. Almost all microphones are directional, meaning they have area around the mic that doesn’t pick up sound from one direction. The most common pickup pattern is cardioid (ex. SM58). If you have a cardioid mic then put the monitor on the floor directly in front of the mic. Supercardioid microphones (ex. Beta58) pick up from behind the microphone but have areas of rejection 120° away from the front of the mic on both sides. If you have this type of mic, place your monitors either a little to the front left or front right of the mic so that the monitor is in the area of rejection. This will cut down on feedback.
Mixing
If you have a passive mixer with faders (sliders) you will often have a separate output section that will work for making a monitor mix.
The position of each channel fader will dictate how much signal from the instrument plugged into that channel will go to the master fader and then out of the main output jacks.
You may have a knob on each channel that is labeled AUX (auxiliary) or sometimes MON (monitor) but for this article we will call it AUX.
This knob acts like the fader of that channel except when you turn it up you increase the amount of signal that is being fed to the AUX SEND output on the mixer.
Connect a cable from the AUX SEND to your powered monitor and now you can mix your monitor. Need more vocal in your monitor? Go to the channel your mic is plugged into and turn up the AUX knob on the channel to get more signal into your monitor.
If you have a powered mixer, some models are designed with a Main/Mon section.
By selecting the Main/Mon setting, you can treat one speaker as the Main speaker and one speaker as a Monitor. In this mode, you often have a MON knob on each channel for mixing your monitors and a graphic EQ for cutting back on feedback in the monitors.
EQ
EQ can be adjusted to further cut back on feedback in the monitors. Feedback comes from a relationship between volume and distance and when monitoring the mic is in close proximity to the speaker. A study of
common EQ techniques for the mic and monitor speaker you have will help in eliminating feedback altogether.
Volume
Fifteen minutes into a performance the artist’s ear adjusts to the volume of the monitors and they will want to turn up the volume. About 3-4 songs into the set it’s a good idea to take a quick break and make adjustments.
The most common PA mistake is to neglect the use of a vocal monitor when running your own sound system. Proper vocal monitoring is elemental if you want to have a great performance.
Vocal monitoring can come from a standalone solution or by simply changing the signal routing in your current rig. A monitor differs from a main speaker in the fact that it must provide audio to a musician that is in close proximity and who may be holding an instrument that could introduce feedback into the system such as an acoustic guitar plugged into the mixer. For this reason, a monitor may need different placement, mixing, EQ and volume than its main speaker counterpart.
Photo Credit: LOMM Staff


